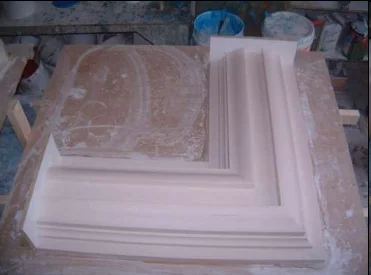
GRC(Glass fiber reinforced concrete) components are made and formed in molds. Many products do not require model making, and molds can be made directly. However, more complex components need to make models first, and then use the models to make molds. In this article, we are going to introduce 3 common types of mould production.

Silicone Mould
Scope of Application:
Applicable for the production of components with intricate sculptural designs, textured surfaces, or rich details where rigid moulds cannot ensure easy demoulding.
Details:
- a. Preliminary Preparation:
Before starting, verify that the prototype is designed with reasonable parting lines for mould creation. - b. First Coating:
Evenly spray a release agent on the prototype, mark parting lines, and insert parting sheets. Dilute the silicone, then uniformly coat it on the prototype’s surface. Use an air hose to blow out bubbles for a smooth finish. - c. Layering and Reinforcement:
Once the initial silicone layer cures, apply a second layer of silicone, then lay the first layer of degreased gauze flat. Repeat with a second gauze layer using the same method, ensuring two layers of gauze are adhered. For the final layer, apply silicone and use crumpled gauze to enhance bonding strength with the fiberglass outer shell. Add two or three silicone layers as needed and place silicone blocks or lock strips at regular intervals to secure the mould with the outer shell. - d. Curing and Trimming:
After complete silicone curing, trim the edges for smoothness. - e. Backing Support:
Create an external plaster or fiberglass shell. Let it rest (typically over 5 hours), then disassemble the mould along the parting lines. - f. Flange Drilling:
Drill holes for flange screws along the flange edge. - g. Mould Maintenance:
After curing for a day, remove the main prototype, clean the mould surface, and trim the flange edges. - h. Completion:
Ensure the mould meets all requirements and is ready for production.

Fiberglass Mould
Scope of Application:
Suitable for creating components like door and window frames, beams, columns, or linear designs where surfaces allow for seamless demoulding.
Details:
- a. Preliminary Preparation:
Apply varnish to the prototype surface for isolation to facilitate demoulding. - b. Gel-coat Application:
After varnish dries, prepare the gel-coat and apply it in an area with good air quality. Coat twice using a brush, ensuring even thickness of 0.9–1.1mm. Allow partial curing (30–40 minutes) between layers. - c. Layering and Reinforcement:
Once the gel-coat sets, apply 250# fiberglass, rolling firmly with an iron roller to eliminate air bubbles. After partial curing (~30 minutes), sand the layer with 80# sandpaper and apply additional fiberglass layers to reach the desired thickness. If high durability is needed, increase thickness. Allow 12 hours for full curing. - d. Mould Reinforcement:
Reinforce the back of the fiberglass mould with a steel or wooden frame, connecting it to the mould using resin and fiberglass mats. - e. Demoulding and Polishing:
After reinforcement, rest the mould for at least 8 hours before careful demoulding. Repair any surface defects, then sand with varying grades of sandpaper until the surface meets product specifications. Finish by polishing the mould surface. - f. Flange and Inspection:
Install and inspect flange edges for alignment with drawings and production requirements. - g. Completion:
Verify all details, including surface texture and structural integrity, before finalizing.

Gypsum Mould
Scope of Application:
Used for simple designs, low production quantities, or as intermediary moulds for secondary replication.
Details:
- a. Release Agent Application:
Coat the prototype surface with a release agent to prevent adhesion. - b. Plaster Spraying:
Spray plaster onto the prototype, adjusting thickness to match the design’s scale while ensuring uniform coverage. - c. Reinforcement with Hemp Fiber:
Enhance the plaster’s strength with hemp fibers, thoroughly hand-rolled and evenly distributed in the plaster mix. - d. Mould Reinforcement:
Strengthen the mould using wooden or iron supports before demoulding. - e. Demoulding and Protection:
Let the mould rest for at least 5 hours before carefully demoulding. Protect the surface to avoid damage. - f. Sectioning and Numbering:
For complex designs, section the mould and clearly number parts for reassembly. - g. Assembly and Jointing:
Assemble sections, ensuring proper alignment and seamless joint finishing to ensure product integrity during demoulding. - h. Mould Inspection:
Inspect surface texture, completeness, and reinforcement. - i. Completion:
Finalize the mould and prepare it for use.
Conclusion
Moulds have a great impact on the quality, production cycle and cost of GRC products, and are a very important link in production. In mold design, the mold type should be determined based on factors such as component shape, texture, precision, turnover times, cost control, etc., and the material should be further selected. If there are any question, Conshell will be glad to be contacted anytime.

